Learn the correct car washing order, how to protect paintwork, and which products to use for fabric, leather and Alcantara car interiors.
Keeping your car clean takes more than a quick wash and an air freshener. The right routine helps preserve paintwork, keeps seats looking fresh and makes everyday dirt easier to remove.
For drivers in Ireland, rain, muddy roads and winter road salt make regular car care especially useful. Whether you have just bought a car or are preparing one for sale on Bargaindigger.ie, this guide explains the correct washing order and how to clean and protect the interior.
What Is the Correct Order for Washing and Protecting a Car?
For a thorough exterior clean, follow this sequence:
1. Clean the wheels and tyres.
2. Pre-wash the bodywork and rinse.
3. Hand-wash from the roof down.
4. Rinse thoroughly.
5. Remove bonded contamination if needed.
6. Dry the car.
7. Polish the paintwork if needed.
8. Apply suitable paint protection.
9. Finish the exterior glass, trim and tyres.
Polishing and decontamination are occasional treatments, rather than steps you need at every wash. A normal maintenance wash usually requires wheel cleaning, pre-washing, hand-washing, rinsing and drying.
If you are also deep-cleaning the seats, do that early enough to allow plenty of drying time.
1. Start with Cool Wheels and Tyres
Wheels collect brake dust, road grime and oily deposits. Clean them before washing the bodywork so that dirty splashes do not land on freshly cleaned paint.
Use a wheel cleaner approved for your wheel finish, a soft brush and separate cleaning tools for the tyres. Avoid using your wheel brush or wheel wash mitt on the bodywork.
Work on cool wheels, follow the product’s contact time and rinse thoroughly. Never allow wheel cleaner to dry on the surface.
2. Pre-Wash to Remove Loose Dirt
Pre-washing helps remove loose grit before you touch the paint.
Apply an appropriate automotive pre-wash or snow foam according to its instructions, allow it to dwell and rinse thoroughly. Work in the shade on cool panels, and do not let the product dry.
When using a pressure washer, follow its recommended distance and take particular care around damaged paint, seals, cameras and trim.
3. Hand-Wash from the Roof Down
Use a dedicated car shampoo and a clean microfibre wash mitt. Household washing-up liquid is not designed for maintaining automotive paint protection.
Start with the roof, then wash the windows and upper panels. Leave the lower doors, bumpers and sills until last because these usually carry more dirt.
Rinse your mitt frequently. A separate rinse bucket can help keep grit out of the shampoo solution, but clean tools and frequent rinsing remain essential.
Avoid scrubbing in circles or pressing hard against stubborn marks. Soften and treat contamination with the correct product instead.
4. Remove Tar and Bonded Contamination Only When Needed
After washing, inspect the paint. Tar spots and embedded particles may remain even when the surface looks clean.
Depending on the contamination, you may need:
- An automotive tar remover for tar deposits.
- An iron fallout remover for suitable surfaces affected by metallic particles.
- A lubricated detailing clay for remaining bonded contamination.
Check compatibility with paint, wraps, trim and existing coatings. Follow each product’s instructions and rinse or rewash where required.
Clay can leave fine marks, so use it only when necessary. A car that already feels smooth does not need claying at every wash.
5. Dry with a Clean Microfibre Towel
Do not leave the car to air-dry if you want to minimise water spots.
Use a soft drying towel and work gently from the top down. Dry around mirrors, handles and panel gaps where trapped water can drip out later.
Most traditional waxes and sealants need dry paint, although some spray products are designed for wet application. Always check the label.
6. Polish Before Applying Paint Protection
Polishing improves the finish; protection helps preserve it.
An abrasive polish can reduce certain fine defects by removing a small amount of clear coat. Some other polishing products mainly clean the surface or temporarily disguise imperfections.
Polish only when the paint needs it. Machine polishing requires care, particularly around edges, repainted panels and thin clear coat.
Autoglym’s published care sequence also places washing before polishing, followed by a protective product.
7. Choose Wax, Sealant or Ceramic Protection
Once the surface is properly prepared, choose protection that suits your maintenance routine.
Protection Main purpose Application considerations
Car wax Adds gloss and a protective surface layer Usually straightforward to apply; needs periodic renewal
Paint sealant Provides synthetic protection and easier maintenance Preparation and curing requirements vary
Ceramic spray sealant Offers a convenient protective treatment Follow wet or dry application instructions
Ceramic coating Provides a more durable coating system Requires careful preparation and suitable curing conditions
You do not need to apply every type. Choose a compatible system and follow its instructions.
A ceramic spray is also a different product from a professionally applied ceramic coating. Neither makes paint scratch-proof or removes the need for careful washing.
For matte paint, satin finishes and wraps, use products specifically approved for that surface. Conventional polishing can permanently alter the appearance.
How to Clean Your Car Interior in the Right Order
For the interior, use this sequence:
1. Remove rubbish, personal items and floor mats.
2. Vacuum seats, carpets, seams and crevices.
3. Clean the dashboard, door panels and other surfaces.
4. Clean the upholstery with a material-specific product.
5. Allow the upholstery to dry fully.
6. Apply compatible protection.
7. Clean the inside glass.
8. Refit clean, dry floor mats.
Before starting, identify the seat material. Fabric, coated leather, synthetic leather and Alcantara require different treatment.
Test unfamiliar products on a hidden area first, and follow the vehicle handbook as well as the cleaner’s instructions.
How to Clean and Protect Fabric Car Seats
Vacuum before using upholstery cleaner
Remove dust, crumbs and grit from the seat surface and seams. This makes wet cleaning more effective and reduces the amount of dirt being worked into the fabric.
Use an automotive fabric cleaner
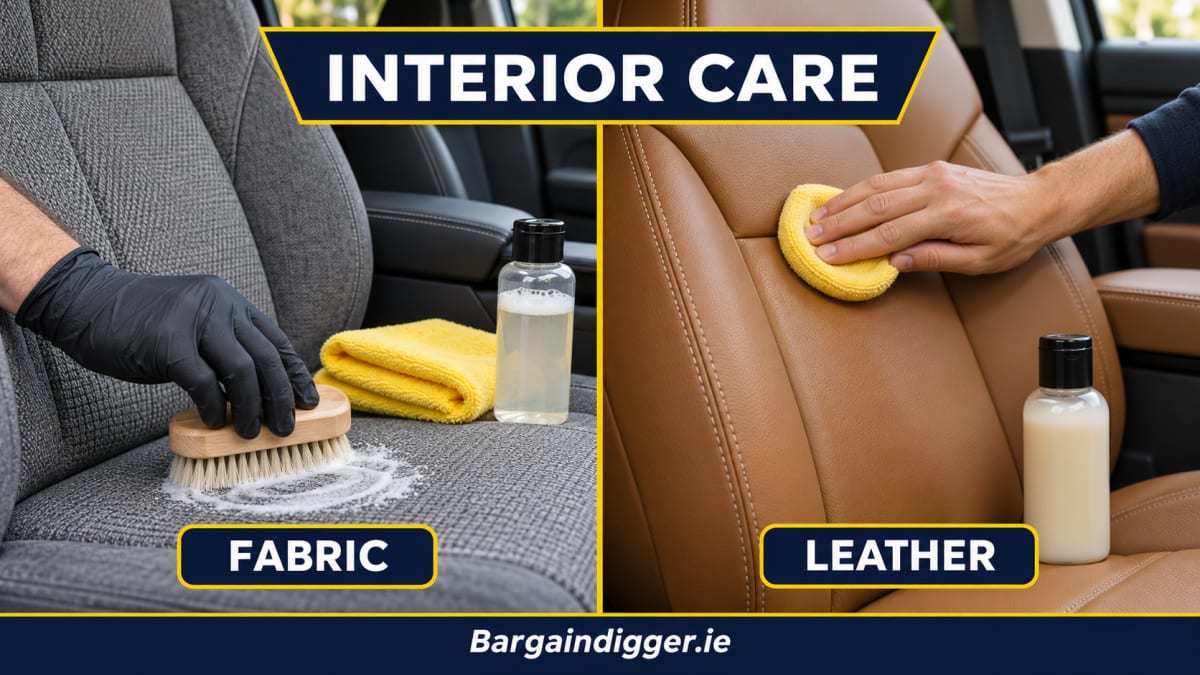
Choose a cleaner labelled for car upholstery. Apply the recommended amount, gently agitate where permitted and remove the residue as directed.
Avoid soaking the seats. Excess moisture can penetrate the foam, prolong drying and affect electrical components beneath or inside the seat.
For heavier staining, an extraction machine may help if the seat manufacturer permits it. Use controlled amounts of liquid and extract thoroughly.
Dry fully, then apply fabric protection
A compatible fabric protector can help reduce liquid absorption and make some spills easier to clean. It does not make seats waterproof or stain-proof.
One example is Gtechniq I1 Smart Fabric, a dedicated fabric protection product. Apply it only to suitable, properly prepared upholstery, observing the manufacturer’s ventilation and curing instructions.
Blot spills promptly even after treatment.
How to Clean and Protect Leather Car Seats
Check the leather type
Many modern car seats use coated leather, while others contain synthetic panels or more delicate finishes. A product suitable for one material may be unsuitable for another.
Clean gently
Use an automotive leather cleaner approved for the seat finish. Apply it to a cloth or soft cleaning brush as instructed, work gently and wipe away residue.
Avoid flooding perforations, stitching and seams. Do not use household degreasers, furniture polish or aggressive solvents.
Apply suitable leather protection
For compatible coated automotive leather, a dedicated protector can help reduce friction wear and dye transfer from clothing.
For example, Gtechniq describes L1 Leather Guard as a protective treatment for automotive leather. Use it according to its compatibility and application guidance.
Do not assume every leather seat needs a heavy conditioner. Choose care products for the actual finish, and avoid leaving seats greasy or slippery.
Synthetic leather should receive products approved for synthetic leather or vinyl.
How to Clean Alcantara and Suede-Effect Upholstery
Alcantara needs gentle maintenance. Remove loose dust with a soft brush or suitable vacuum attachment, then use a lightly damp cloth or a cleaner approved for the material.
Avoid soaking, aggressive brushing and leather conditioners.
Alcantara’s official guidance advises against direct steam, bleach, aggressive solvents and excessive heat.
Do not automatically apply a standard fabric waterproofing spray. Use protection only where both the upholstery guidance and the product instructions permit it.
Which Products Should You Use Inside a Car?
Choose cleaning products that match each surface. Always follow the manufacturer’s instructions and test unfamiliar products on a hidden area first.
Fabric Seats and Carpets
Clean with an automotive upholstery cleaner. Allow the fabric to dry completely before applying a compatible fabric protector.
Coated Leather
Use a cleaner approved for coated automotive leather, followed by a suitable leather protector. Avoid leaving the surface greasy or slippery.
Synthetic Leather or Vinyl
Choose a cleaner specifically approved for synthetic leather or vinyl. Apply a compatible protectant only if recommended for the material.
Alcantara
Use an approved Alcantara cleaner or follow the material manufacturer’s gentle cleaning instructions. Avoid soaking, aggressive brushing and leather conditioners. Apply protection only if explicitly approved for Alcantara.
Dashboard and Door Plastics
Use an interior cleaner suitable for the surface finish. Where appropriate, finish with a matte, non-greasy protectant. Avoid glossy products that can create reflections on the windscreen.
Touchscreens and Instrument Displays
Follow the vehicle manufacturer’s cleaning instructions. Use an approved screen cleaner where permitted, and avoid spraying directly onto displays. Do not apply dashboard dressing or general-purpose coatings.
Interior Glass
Use an automotive glass cleaner compatible with any window tint film. Buff dry with a clean glass cloth for a clear, streak-free finish.
Rubber Floor Mats
Clean with a suitable rubber or floor mat cleaner. Allow the mats to dry completely before refitting them. Do not apply slippery dressings.
Keep all dressings and protectants off pedals, steering wheels, gear controls and other grip surfaces.
Apply products to a cloth where appropriate to control overspray, especially near switches, displays and vents.
Keep dressings off pedals, steering wheels, gear controls and floor mats. A glossy dashboard can also create distracting reflections.
How Often Should You Wash and Clean Your Car?
A practical starting point is an exterior wash every one to two weeks, adjusted for mileage, weather and where the car is parked.
Remove bird droppings promptly using a suitable soaking method, and clean off heavy mud or winter salt when practical. Never scrape contamination from dry paint.
Inside, vacuum regularly and clean spills immediately. Deep-clean upholstery when it needs it, and renew protective products according to their instructions and the amount of wear.
In Ireland’s damp weather, allow extra drying time after wet cleaning. Avoid closing up the car with damp seats or carpets.
Common Car Cleaning Mistakes to Avoid
- Wiping dirty paint with a dry cloth.
- Washing hot panels in direct sunlight.
- Using the same tools for wheels and bodywork.
- Polishing at every wash.
- Applying protection over dirt or damp upholstery.
- Soaking seats and roof linings.
- Using leather conditioner on Alcantara.
- Leaving slippery dressing on controls or mats.
- Covering damp smells with fragrance instead of finding the cause.
Preparing Your Car for Sale on Bargaindigger
A clean car helps buyers assess its condition and makes listing photographs clearer. Focus on clean wheels, clear glass, tidy seats and dry carpets.
Keep the finish natural: greasy seats and heavily glossed dashboards can make the interior less appealing. Cleaning also does not replace servicing or repairing faults.
When your car is ready, take photographs in good daylight and describe its condition accurately on Bargaindigger.ie.
Frequently Asked Questions
Should I wax or polish my car first?
Polish first if the paint needs it, then apply compatible protection. Polishing afterwards can remove the protective layer.
Do I need to polish every time I wash?
No. Regular washing and careful drying are usually enough between occasional polishing treatments.
Can I use the same cleaner on fabric and leather seats?
Only if the manufacturer explicitly approves it for both materials and the relevant finishes. Follow any different dilution instructions.
How do I protect fabric seats from spills?
Clean them, allow them to dry fully and apply a compatible automotive fabric protector. Blot spills quickly because protection cannot prevent every stain.
Can I apply seat protection while the upholstery is damp?
For products requiring dry fabric, wait until it has dried completely. Follow the specific product’s preparation and curing instructions.